
Magic Arena’s Pauper Events have easily overtaken every other gameplay style as my absolute favorite on Wizards of the Coasts’ online gaming platform. Using only the cards in the current Standard rotation, players are forced to forge the most powerful decks they can muster using only common cards, the weakest that Magic has to offer.
No easy task. The restriction to Standard cards makes it a bit easier to pluck out winners, as opposed to normal Pauper which is really expansive, but grinding out five wins continues to be a tall order for some.
Magic Arena’s Holiday Event, which ran the last two weeks of December, allowed players to unlock an alternative art Firemind’s Research if they managed to go 5-0 or 5-1 in succession against any other player. Those who lost two games along the way scored a sweet Llanowar Elves alternative art.
During the event, I saw a plenty of interesting decks, but the one I made did far better than I expected. White/Green “Go Wide” Auras was my strategy, and I managed to go 5-0, 5-0, and 5-1 pretty handily before purposefully losing a bunch of 1-2 matches to get the Llanowar Elves. My last push to get my fourth and final rare came to a 4-2 conclusion, but I decided I had had enough at that point.
And any rate, this deck excelled against Red Aggro decks, Rat Colony Decks, Izzet Wizards, White Lifegain, and almost any other popular combination that was placed in front of me. Blue/Black Dimir Surveil decks emerged as my worst matchup if the game went on too long, as this was the deck that often knocked me out of contention.
1-Drops
Three cards stood out as potential curve starters for the deck, and two made the cut. If you’re playing this deck and see one of these cards in your opening hand, you play it! No mulligans!
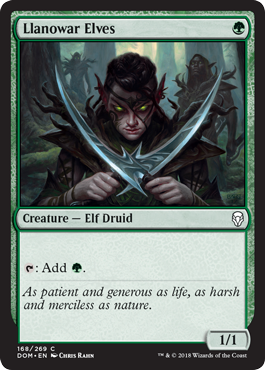
When you have access to one of the all-time great Magic cards, you include that s&*#! Llanowar Elves will help you cast your creatures faster, eat potential removal spells, and blocks charging threats in a pinch. It serves every purpose in the deck and should be played in full.

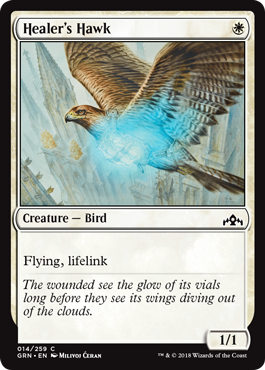
Healer’s Hawk turned out to be quite the stud in Guilds of Ravnica’s Limited format, and it’s just as solid here. Play them early, secure your life total, and later in the game, if you drop an Aura on it, your opponent will be praying for a removal spell. Play four of these as well, no question.
2-Drops
Another all-star of the deck, especially if you’re looking to go wider than your opponent. Early in the game, this provides two blockers, which should easily hold back most common threats. Rat Colony HATES this card.
Later in the game, dropping four saprolings can get in the last few points of damage since your opponent will likely be unable to assign enough blockers to cover them all. This is another card where you easily play four. A superstar stud in the deck.
3-Drops
And if we’re talking superstar studs, this is how you win the game! Pegasus Courser is so good, Wizards of the Coast had to boost it to uncommon after two sets of it dominating at common. The gift of flight is important, especially in a “go wide” deck, where your creatures might be fortified enough to hold back an army but not strong enough to punch through bigger attackers.
Pegasus Courser will take your tokens to high places, picking away your opponents life total two points at a time. The card also blocks early attackers very well, and teaming it up with some of your late-game bruisers will really put the pressure on your opponent. Four copies, no questions.
Not quite as solid as he was in Limited, but Jungle Pioneer brings along a very important friend onto the battlefield. That hexproof Merfolk token is a perfect target for any Aura spell you might cast since your opponent won’t be able to remove it outside of straight up combat. If you trade a Merfolk token for a 4/4 or a 5/5 creature, you’re out on top.
Just two copies of this “heeeeeeey” guy are enough.
Not half as effective as Saproling Migration, but you’ll want one or two of these to secure your life total when things go awry. That three mana is expensive for just two tokens at sorcery speed, but you can’t argue against the card once you slap an Aura or two on a token.
4-Drops
This is the highest you want to go. When your tokens can’t get the job done, you’ll be happy to have a few of these beefy creatures to block, break a stalemate, or straight up finish the game.

Baloth Gorger is the best big, common, Green beef in Standard right now, thanks to its versatility. Play it early as a 4/4 for four mana, and it should easily be the biggest creature on the board. Play it later as a 7/7 for eight mana, and you are guaranteed the biggest creature on the board. Either way, Baloth Gorger is the right choice to top off your curve. My deck had three, and I was always happy when I drew it.
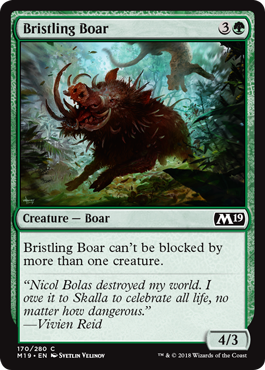
There are certainly better choices than this, but Bristling Boar comes down early and heavy enough to do what we need to do. With an Aura, or even without one against some decks, this is a removal spell every turn as players won’t want to take four damage but also won’t be able to gang up on it.
The boars main competition are Vigorspore Wurm, which is a bit slow, and Rosemane Centaur, which can get ganged up on easily. Both are also fine and probably better choices than Bristling Boar, but a single one of these in your deck should help clear out stalled lines better than the other two.

Just one of these is enough, but those 2/2 vigilance knights should help you out in a pinch. This card dodges Essence Scatter, making it slightly more viable than Gallant Cavalry. Counter spells are played more often than bounce spells, but Blink of an Eye and Unexplained Disappearance do make this card a bit weaker.
If you ask me, the counterspell is deadlier since you get nothing out of it, so run with this.
5-Drops
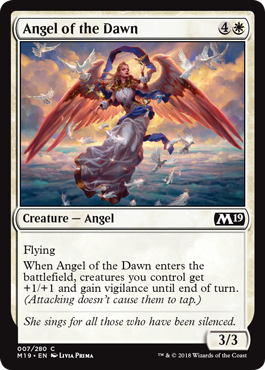
We’re getting a bit big here, but this is a solid choice. Initially, I ran with two Bristling Boars, but I swapped one out for Angel of the Dawn to fairly decent results. When your army of tokens become 2/2’s, they become legitimate threats that can also keep up your defenses the next turn. Opponents will probably struggle to come up with profitable blocks when you attack.
The 3/3 flyer left behind also provides some beef in the air that opponents will have to adjust for.
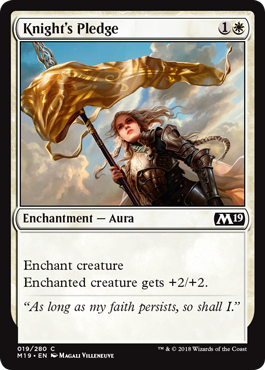
Auras
I tried the deck once without Auras, but I didn’t like it as much. My creatures never felt threatening enough, and my Healer’s Hawks and Merfolk tokens were far less useful. Don’t go overboard on Auras, but also understand that a few might be necessary to be consistent with your wins.
We’re looking for efficiency here, nothing overpowered or too expensive.
+2/+2 for two mana is a great choice. A 3/3 Healer’s Hawk on turn-2 should leave your opponents shaking in their boots. One of these is all you need, but sometimes like to swap out my Angel of Dawn for an extra one.
Likewise, +3/+3 for three mana is also great, making Healer’s Hawk a 4/4 or turning your Gorging Baloths into a 7/7 for less mana than when you pay its kicker. Two of these will be enough.
Removal
NEVER leave home without them, kids. Run four and watch as opponents cry when they have nothing to block your army of tokens with.
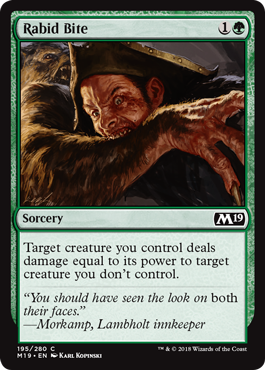
No reprisal damage makes this effective in the early game if you are being aggressive with your tokens, and it makes it effective later in the game when your Gorger Baloths are chucking around 4 or 7 damage into puny opponents. Remember, when tied to a Healer’s Hawk, you get the lifelink damage, too!
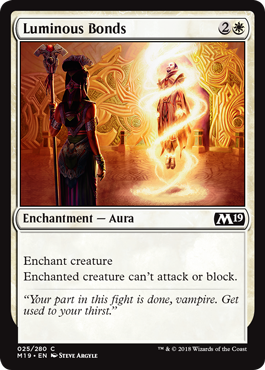
Three should be enough here. Not as exceptional as Luminous Bonds, but it’s still the second best removal spell available to us.
The Closer
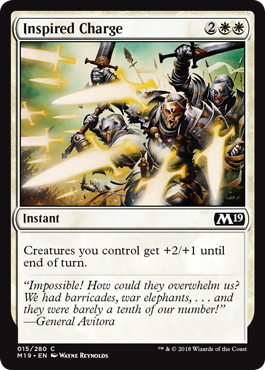
It took me a while, but when I realized the power of this card in this deck, I had to run it. When you have four saproling tokens that change from 1/1s into 3/2s at instant speed, your opponents will be taking 12 damage directly to the face or losing two or three creatures with blocks. Devastating once you’ve hit mass.
I only ran two since I found other ways of winning, but I never lost when this was in my hand.
The Deck
Creatures (19)
- 4x Healer’s Hawk
- 4x Llanowar Elves
- 4x Pegasus Courser
- 2x Jungleborn Pioneer
- 1x Bristling Boar
- 3x Baloth Gorger
- 1x Angel of the Dawn
Instant/Sorcery (11)
- 4x Saproling Migration
- 3x Rabid Bite
- 1x Sworn Companions
- 1x Call the Cavalry
- 2x Inspired Charge
Enchantments (8)
- 1x Knight’s Pledge
- 4x Luminous Bonds
- 2x Oakenform
Lands (23)
- 13x Plains
- 10x Forest
Notice how there are no tap lands in my deck. I prioritize landing the Healer’s Hawk or the Llanowar Elves on turn-1, so no, no tap lands. They only really help when you’re ready to cast Inspired Charge, but at that point, hopefully you already have two white mana open.
As for Ravnica Allegiance, I don’t see any commons yet that will help this deck, and seeing how the White/Green Selesnya Guild won’t be represented in the set, we won’t get any powerful commons like Rosemane Centaur to help us out. Maybe a mono-color or two will make the cut, something we should know in the coming weeks.
Green really needs the help. It was so bad in Guilds of Ravnica.