Knowing how to clean video game consoles and controllers properly can help keep your gaming equipment in good condition, but there’s a surprising amount of conflicting advice about the best way to do it. Some people swear by rubbing alcohol, others reach for a can of compressed air, and still others suggest taking everything apart for a thorough cleaning. Unfortunately, following the wrong advice can turn a simple maintenance job into an expensive repair.
Modern consoles are particularly good at collecting dust. Their cooling systems constantly move air through the hardware, bringing airborne particles along for the ride. Controllers have a different problem. Between the oils on our hands, crumbs from gaming snacks, and the occasional spilled drink, they can become downright unpleasant to handle.
The good news is that routine cleaning generally doesn’t require specialized equipment or extensive technical knowledge. In most cases, a soft cloth and a few minutes of attention are enough to deal with everyday dirt and grime.
There is one important complication, however: Nintendo, Sony, and Microsoft don’t always recommend the same cleaning methods. Before reaching for a bottle of cleaning solution, it’s worth understanding what is safe for your particular hardware.
Before You Start Cleaning Your Gaming Equipment
The first step is simple: turn everything off.
For a console, that means shutting it down completely rather than leaving it in rest or sleep mode. Disconnect the power cable and any attached accessories before cleaning. If the console has been running for several hours, give it time to cool down before handling it.
Wireless controllers should also be turned off and disconnected from charging cables. If you’re cleaning a controller with removable batteries, taking them out provides an additional precaution.
You’ll want a clean, soft, lint-free cloth. Microfiber cloths are particularly useful because they can remove fingerprints, dust, and light grime without requiring much pressure. Having a second cloth available for drying surfaces is helpful if your console’s manufacturer permits damp cleaning.
What you shouldn’t do is grab the nearest household cleaner and start spraying.
Cleaning products intended for kitchen counters, bathrooms, or glass aren’t necessarily appropriate for electronic equipment. Some contain chemicals that can damage plastic finishes, protective coatings, or other surfaces. More importantly, spraying liquid directly onto a console or controller creates an opportunity for moisture to enter openings that were never designed to get wet.
Even rubbing alcohol, frequently recommended for electronics, isn’t universally approved. Nintendo permits certain alcohol-based disinfectants for its Switch hardware, while Sony’s PlayStation cleaning instructions warn against alcohol and chemically treated cloths.
That difference is why the manufacturer’s instructions should take priority over general cleaning advice.
How to Clean a Video Game Console
Most consoles spend their lives sitting on entertainment centers, shelves, or desks, where they gradually accumulate dust. A console that looks perfectly clean from across the room may have a surprising amount of buildup around its ventilation openings.
Begin with the exterior. Use a soft, dry cloth to wipe away loose dust from the top, sides, and other accessible surfaces. Pay attention to recessed areas where dust tends to settle, but don’t force the cloth into ventilation openings or ports.
For stubborn fingerprints or marks, the appropriate next step depends on the manufacturer.
Microsoft’s Xbox cleaning guidance permits a soft, lint-free cloth lightly dampened with mild soap and water. Sony generally recommends a soft, dry cloth for cleaning the PS5 exterior, while Nintendo allows a soft cloth lightly dampened with water for its Switch systems.
These distinctions may seem excessive when you’re just trying to remove a fingerprint, but different plastics, finishes, and coatings can react differently to cleaning products. There’s little reason to risk expensive hardware unnecessarily.
Removing Dust From Console Vents
Ventilation is one of the most important areas to consider when cleaning a console.
Modern gaming systems generate considerable heat, particularly when running demanding games. Fans and ventilation openings help move that heat away from internal components. When dust accumulates around those openings, it can interfere with airflow and make the cooling system’s job more difficult.
Fortunately, some manufacturers provide specific instructions for removing accumulated dust.
Sony recommends using a low-powered vacuum cleaner to remove dust from the PS5’s ventilation openings. The company also recommends leaving at least 10 centimeters of clearance around the console to allow adequate airflow.
Those recommendations are covered in Sony’s official PS5 ventilation and noise guidance.
Nintendo’s Switch 2 safety guidance also addresses removing dust from air intakes and ventilation openings with a vacuum cleaner. However, that doesn’t mean the same procedure should automatically be applied to every console ever manufactured.
For Xbox hardware, Microsoft’s general consumer-cleaning instructions focus on exterior cleaning. Rather than assuming that a vacuum cleaner is appropriate for every Xbox model, follow the documentation for your specific console.
Whatever system you own, avoid pushing objects into ventilation openings. The goal is to remove accessible dust, not force debris deeper into the hardware.
Should You Use Compressed Air?
Compressed air is frequently suggested as a solution for dusty electronics, and it’s easy to understand the appeal. A quick blast seems like a convenient way to reach areas that a cloth cannot.
The problem is that blowing air into a console doesn’t necessarily remove the dust. Depending on the design, it may simply move debris farther inside. Aerosol dusters can also discharge liquid propellant if handled improperly.
We couldn’t establish a universal recommendation from Nintendo, Sony, or Microsoft endorsing canned compressed air for routine cleaning of their current consoles.
For that reason, I wouldn’t make compressed air the default solution. If your console’s official instructions recommend a particular dust-removal method, use that method rather than improvising with pressurized air.
How to Clean Game Controllers
If there’s one piece of gaming equipment that deserves regular cleaning, it’s the controller.
Unlike a console, which might sit untouched for months, controllers are constantly handled. Skin oils, sweat, dust, and food residue accumulate on their surfaces, particularly around buttons, thumbsticks, triggers, and textured grips.
Anyone who’s picked up a controller used heavily for years knows how unpleasant that buildup can get.
Start by wiping the controller’s exterior with a clean, soft cloth. Pay particular attention to the handles and grips, where oils from your hands tend to collect. Don’t overlook the back of the controller, especially the areas around triggers and shoulder buttons.
For ordinary dirt, a dry microfiber cloth may be sufficient. If additional cleaning is necessary, check the manufacturer’s recommendations before dampening the cloth or using a cleaning product.
Microsoft permits certain damp cleaning methods and premoistened disinfecting wipes for Xbox equipment. Nintendo allows a soft cloth lightly dampened with water and permits specified alcohol-based disinfectants for Switch hardware. Sony’s DualSense instructions are more restrictive and caution against alcohol and chemically treated cloths.
In every case, avoid spraying cleaning products directly onto the controller.
Cleaning Around Buttons and Thumbsticks
The most frustrating areas to clean are usually the places where dirt collects along the edges of buttons and around the bases of analog sticks.
These areas are hard to reach because the openings are narrow, and moving parts create small spaces where grime can build up.
Begin by removing whatever dirt you can reach with a soft cloth. Gently moving the thumbsticks through their normal range of motion can expose additional exterior surfaces that need attention.
Don’t force the sticks beyond their normal movement, and don’t press cleaning tools into the openings around them.
It’s tempting to reach for a cotton swab soaked in rubbing alcohol, but that isn’t a universally approved cleaning method. Introducing liquid around buttons or analog-stick mechanisms can create problems if it reaches internal components, and alcohol may be unsuitable for the controller’s exterior finish.
A small, soft, dry brush may help dislodge loose dirt from accessible exterior crevices, provided you use it gently and keep the bristles out of internal openings. However, that should be treated as an optional surface-cleaning technique rather than a manufacturer-approved procedure for every controller.
If grime has accumulated beneath a button or inside a thumbstick mechanism, ordinary exterior cleaning may not be enough to remove it safely. That’s where routine maintenance starts crossing into repair territory.
Can Cleaning Fix Controller Stick Drift?
Stick drift is one of the most frustrating controller problems. Your character begins moving without input, or the camera slowly rotates even though you aren’t touching the right analog stick.
Because dust and debris can sometimes interfere with moving components, cleaning is frequently suggested as a solution.
Unfortunately, stick drift has several possible causes, including wear inside the analog-stick mechanism. Cleaning visible dirt from around a thumbstick won’t repair worn internal components.
If your controller is experiencing drift, start with the manufacturer’s troubleshooting recommendations. Sony, for example, provides official DualSense troubleshooting instructions covering controller resets, software updates, and additional support options.
Don’t assume that increasingly aggressive cleaning will solve a problem that may ultimately require professional repair or replacement.
Cleaning Nintendo Switch and Switch 2 Systems
Handheld gaming systems deserve some additional attention because the screen, controls, and console hardware are all handled regularly.
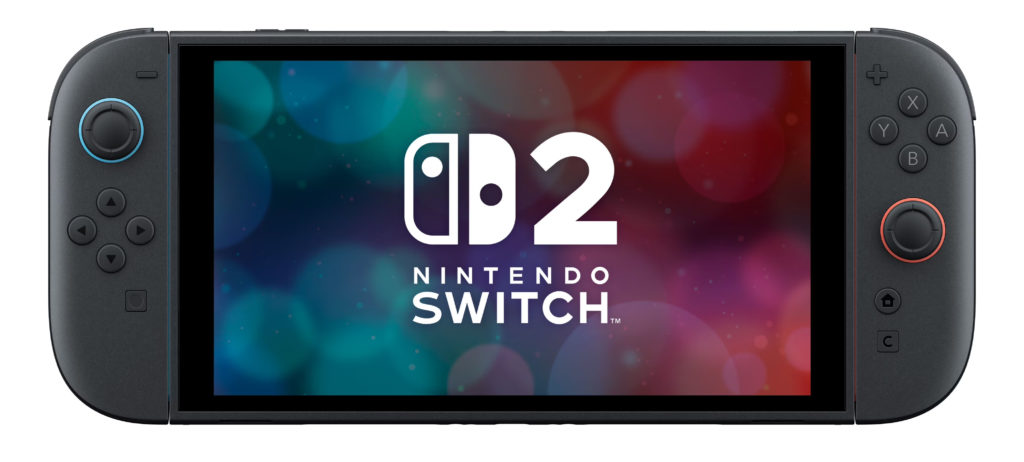
The Nintendo Switch family also introduces considerations that don’t apply to a conventional console sitting beneath a television. The screen collects fingerprints, the Joy-Con controllers accumulate grime, and the docking area can gather dust.
For routine cleaning, Nintendo recommends turning off the system and wiping it with a soft, clean cloth. A cloth lightly dampened with water can be used when necessary, provided liquid isn’t allowed to enter openings.
For fingerprints on the display, a clean, soft lens-cleaning cloth is a sensible starting point. Avoid abrasive materials or excessive pressure, particularly when cleaning a touchscreen.
Don’t spray screen cleaner directly onto the display, and don’t assume that products marketed for televisions or computer monitors are automatically appropriate for a handheld gaming system.
Nintendo also permits certain disinfecting products containing approximately 70% alcohol, applied to a soft cloth rather than directly onto the hardware. That guidance differs from Sony’s recommendations for PlayStation equipment, so it shouldn’t be treated as permission to use alcohol on every gaming device.
For the Joy-Con controllers, concentrate on the exterior surfaces, buttons, and accessible areas around the analog sticks. Avoid introducing moisture into the rails, connectors, or openings.
The Switch dock should also be checked periodically for accumulated dust. With the system removed and the dock disconnected from power, wipe accessible exterior surfaces using the appropriate cleaning method. Don’t insert cleaning tools into the dock’s connectors.
Nintendo’s official cleaning instructions provide additional guidance for maintaining Switch hardware.
When Cleaning Becomes Console Maintenance or Repair
Eventually, you may encounter dust or grime that you can’t reach from the outside.
That doesn’t automatically mean it’s time to take the console apart.
Some modern systems are designed to provide limited access for maintenance. Certain PS5 models, for example, have removable exterior covers that allow owners to reach designated areas where dust can accumulate.
Sony provides instructions for removing and reinstalling those covers. If you decide to perform that maintenance, follow the directions for your exact model, make sure the console is completely powered down and disconnected, and allow it to cool before beginning.
Removing a manufacturer-designed cover according to official instructions is considerably different from dismantling the console’s cooling system or exposing internal circuit boards.
For most owners, there’s no reason to remove fans, heatsinks, or other internal components as part of ordinary cleaning.
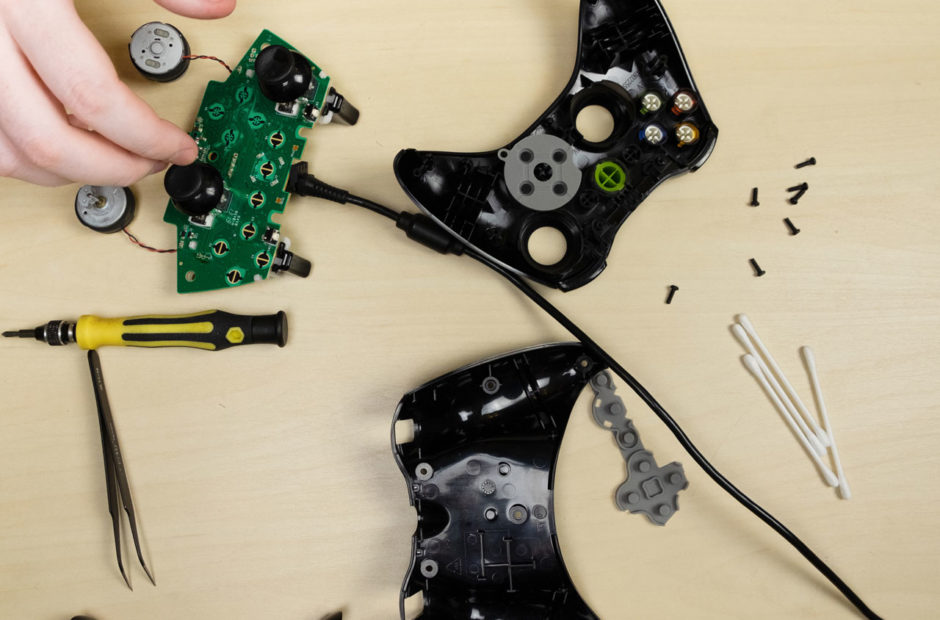
The same principle applies to controllers. Opening a controller to clean internal switches, analog-stick mechanisms, or circuit boards introduces additional risks. Small connectors, ribbon cables, and other components can be damaged during disassembly, even when the person performing the work has good intentions.
If your equipment has persistent overheating problems, unusually loud fans, malfunctioning buttons, or other symptoms that routine cleaning doesn’t resolve, consult the manufacturer’s troubleshooting resources or an appropriate repair service.
Cleaning is maintenance. It shouldn’t become an accidental electronics repair project.
How Often Should You Clean Your Gaming Equipment?
There isn’t a single cleaning schedule that makes sense for every gaming setup.
A console sitting in a relatively dust-free room may need little attention beyond an occasional wipe. Another console, particularly one near carpeting, pets, or frequently opened windows, may accumulate dust considerably faster.
Microsoft recommends cleaning Xbox consoles every three to six months, or whenever necessary. That’s a reasonable reference point for routine exterior maintenance, although it isn’t a universal requirement for every console.
Controllers are another matter. If you play frequently, wiping them down every week or two can help prevent oils and grime from building up. You may need to clean them more often if several people share the same controllers.
It’s also worth paying attention to where your equipment is located.
Keeping a console in an enclosed entertainment cabinet with inadequate airflow can create ventilation problems regardless of how clean the exterior looks. Similarly, placing a console directly on carpeting or crowding its vents with other objects can interfere with cooling.
Give the hardware the ventilation clearance recommended by its manufacturer, and avoid locations where dust, moisture, or excessive heat are likely to become problems.
One particularly easy habit to develop is washing and drying your hands before playing. It won’t eliminate controller grime, but it can reduce how quickly dirt and oils accumulate on the surfaces you’re constantly touching.
A Little Cleaning Goes a Long Way
It’s easy to overlook gaming hardware until something starts going wrong. A controller feels sticky, a console becomes noticeably louder, or you finally notice the layer of dust that’s been accumulating around the vents.
Fortunately, keeping your equipment clean doesn’t have to become an elaborate maintenance routine. A few minutes spent wiping down a controller or checking a console’s ventilation openings can prevent ordinary dirt from becoming a bigger nuisance.
The important thing is knowing when to stop. If a cleaning job requires forcing tools into openings, soaking components with chemicals, or dismantling hardware you’re unfamiliar with, you’ve moved well beyond basic housekeeping.
Video game consoles and controllers are built to be used, and a little wear is inevitable. Treat them with reasonable care, follow the manufacturer’s cleaning recommendations, and spend more time enjoying your games than worrying about the equipment you’re playing them on.